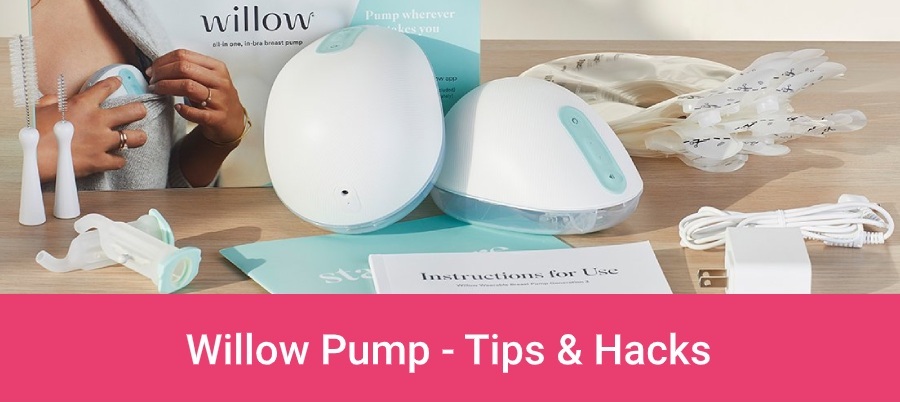
Hesitating about buying Willow Pump? Having any problems with the pump, milk containers or milk bags? In this article you will find tons of useful information about using Willow, plus some helpful ticks and hacks tested by other moms that will make your experience easier!
Here’s everything you’ve always wanted to know about this wearable pump.

Willow Wearable Breast Pump has a learning curve, but trust me – it’s so worth it! Once you get a good hang of it, you’ll be so grateful for having this hands-free pump. Be patient and give yourself a time to get used to your new friend. 🙂
In this article I will answer all those burning questions that moms have about Willow Breast Pump.
This article is NOT a substitute for medical advice.
#1 Can You Use Willow Pump Without Bags?
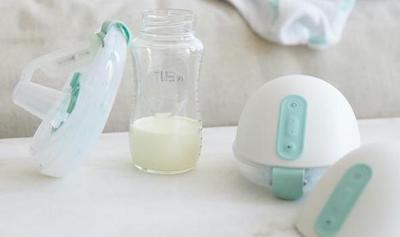
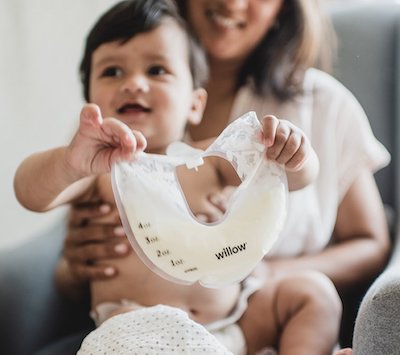
With Willow 3.0 you have two options: you can express your milk into disposable freezer-safe bags or into reusable milk containers. Each bag and each container has the capacity of 4 oz.
Generally speaking using milk bags is great solution when you’re on-the-go – after pumping you can simply put the milk bag into a cooler bag, without the need to transfer the milk into another storage container. It’s also a convenient choice for moms who pump only occasionally while mixing breastfeeding and bottle feeding.
Milk containers are better option for frequent or exclusive pumping – they will cost you less in the long run.
Using Willow with milk containers is very simply – they attach to the pump just like flanges and you can clean them in a dishwasher once you’re done pumping.
>> Milk Bags VS Milk Containers – Differences, Benefits
#2 How Do You Use A Willow Pump Container?
Generally speaking lots of moms agree that the Willow milk containers have a learning curve and it may take even 2-3 weeks to learn how to use them and solve all those errors that the pump shows.
Don’t get frustrated, give yourself some time to practice using it and once you get a good hang of it, you will be dealing with it much faster. It’s also important to practice the alignment a few times, because the milk container is not clear and you don’t see your nipples, so at the beginning the alignment may be more difficult.
If your pump doesn’t recognize the container and doesn’t want to start working it may be because of the valve being too steamy (there may be some residue on it) or the pump may “think” there is too much air in the container.
Willow Milk Container Troubleshooting
One useful tip that some mom shared on YouTube is to use a toothpick to clean the area beneath the valve. You need to be very careful when doing this to not pierce the plastic valve. You need to go around it, like if you were trying to lift it and remove it, but you’re just cleaning the opening where the valve is mounted. This careful extra cleaning often solves the problem and the pump starts working with the container.
When you want to start pumping, make sure the alignment is correct and hold the pump against your breast until it gets really good latch and moves onto expression mode (after that just cover it with the bra).
Another important thing is that once you’re done pumping, you need to rotate the dial to 2 first, to close the air vent. Then you need to bend over and break the latch by placing two finger between your breast and the pump. When you remove the pump from your breast, make sure to the the “flip to finish” move not to loose any milk left in the flex tubes.

#3 How Do You Clean Willow Containers?
You have two options. First is to clean the Willow milk containers in a dishwasher.
The second option is to clean Willow containers by hand and wash them with water, soap and use some sponges and brushes.
Some moms pour warm/hot water with soap inside the container and shake it, but after that type of cleaning there is often a lot of residue that stays inside the container. This. May cause some issues with the pump not recognizing the container.
A better way to clean the milk container is to use small wet sponge (with soap) to clean the easily accessible part. For all those nooks and crannies I recommend you to use a small brush. Willow Pump includes two brushes, but you can also use a narrow brush like the one for cleaning reusable straws or a clean eyelashes brush. This way you will clean all those hard to reach, narrow parts that you can’t clean with your fingers or a sponge.
It’s also very important to clean the area where the valve is. The brand recommends not to use brushes for this part. Some moms recommend using a cotton swab instead.
| PRO TIP: If you feel like the valve on your container still has some residue and is steamy and the pump doesn’t recognize it because of that, you can replace the valve. Simply use the valve from clean, unused Willow milk bag, it has exactly the same valve. |
Just like when cleaning baby bottles, don’t put Willow Pump parts directly into the sink. Get a separate wash basin that you will only use for cleaning your baby’s feeding equipment.
Once you’re done cleaning with sponges and brushes, range the container with hot water and them place it on a special drying rack (that you also use only for your little one’s feeding gear) or on a clean paper towel. It’s best not to use cloth towels because they may carry bacteria and germs that may damage the nutritional value of your breast milk or be harmful for your baby.
It’s really important to clean the Willow containers really carefully otherwise you may experience some issues with the pump not recognizing them and not working.
Willow also recommend to boil the milk container before the first use. Make sure to rotate the dial to 1 first and open the air vent. You can also boil the container once in a while to keep it in a good condition, as it help to remove any residue or milk fat, especially in those hard to access places. After boiling let it cool and dry on a special drying rack.
#4 How Do You Get Milk Out Of A Willow Bag?
Just cut the bag open when it’s time for feeding. Remember that most babies prefer their milk warm or lukewarm (at room or body temperature). Use a warm water bath or a bottle warmer to bring your milk to body temperature (around 99 °F). Do not overheat the milk (above 104°F) because it will destroy precious nutrients in the breast milk and may cause your baby to burn his mouth.
#5 Are Willow Milk Bags Reusable?
Generally speaking the Willow milk bags are not reusable and the brand recommend to use them only one time.
But there are a few hacks to reuse those bags and I know lots of moms do this. Use you own judgment to decide whether to use the bag only one time, as it was designed to, or more.
#6 How Do You Reuse A Willow Pump Bag?
If you’re curious what are the hacks to reuse Willow milk bags, watch the video below – I found it the most helpful video with Willow hacks.
If you ever going to reuse the bags, make sure they are fully empty and that you have removed the air. Also, it’s better to reuse them in less than 24 hours. Like if you’re pumping every 3 hours, it’s better to reuse the bag for the next pumping session, it’s just more hygienic. Between pumping, keep the emptied bag in the fridge.
But once again, use you own mommy instinct and your own judgment before reusing those milk bags if you are willing to take the “risk” of damaging valuable nutritions in the milk or food poisoning.
Remember that you should not mix the milk that was expressed earlier and is already cooled down with freshly pumped (warm) milk.
If you’re pumping often and worrying that you will spend a fortune on the bags, maybe it’s better to invest in a reusable milk container, and use the bags only when you’re out and about?
#7 How Do I Prevent Air In My Willow Bag? How Do You Remove Air From A Willow Bag?
If there is a little air in the bag it’s normal, because when you’re pumping the air may get into the bag with the milk. Small amount of air is okay. But if there is too much air in the bag and it looks puffy, the Pump may show “All Full” alert even though you expressed less than 4 oz. of milk.
To prevent air in Willow milk bags follow these tips:
- Choose the right size of the flange – it may be different than with other breast pumps. To form a good seal the flange cannot be too large or too small.
- The flange should fit snuggly on your breast with no fabric between the pump and your breast.
- Your bra should fully support the pump at the bottom and top and almost fully cover the Willow.
- Hold the pump against your breast for the proper latch until the stimulation phase. Once you’re in that phase, cover the pump with your bra.
- If you need a break or correct the alignment, first press pause button. Keep in mind that realignments cause the air to enter the flange, Flextube and it goes down into the bag. If you don’t pause the pump more air will get into the milk bag.
If you’re wondering how to remove air from Willow bag before you reuse it, it’s best to put a toothpick inside the valve to hold it open, lie the bag down on the table and push the air out of the bag by pressing it from the end forwards the opening.
#8 How Do You Store Willow Bags?
Willow Milk Bags have one-way valve that prevents the milk from leaking. This means that you can store them flat or standing, in a cooler bag when you’re on-the-go, or in the fridge/freezer.
#9 Can You Freeze Milk In Willow Bags?
Yes, you can freeze your breast milk in Willow milk bags, they are freezer-safe.

#10 Does The Willow Pump Hurt?
Pumping should not cause any pain or nipple soreness.Give yourself time to practice the alignment and find the proper vacuum strength so you could feel comfortable while using the breast pump. The good news is that Willow 3.0 offers more gentle suction thanks to new, additional level called Sensitivity Setting.
So if you’ve heard some moms complaining about Willow 1.0 or 2.0 being too strong for them or bearable only on suction level 1, you should keep in mind that the newest Willow 3.0 has solved this issue. It has more gentle and “soft” vacuum level for more sensitive nipples.
It’s also important to take some time to learn how to remove the flange from the nipple to avoid pain or irritation.
>> Willow 3.0 vs 2.0 vs 1.0 – Full Comparison
#11 How Do You Measure A Willow Flange?
Measure your nipple when it’s erect. Use Ruler or Millimeter app on your phone to do the measurement. You should choose a flange that is 2-4mm bigger than your nipple. For example: if your nipple is 17-19mm, you need to choose 21mm flange, if it’s 20-22mm choose 24mm flange, and if it’s between 23 and 25mm, choose 27mm flange.
#12 Does Willow Pump Work On Large Breasts?
Yes! Willow was designed to fit all moms, whether they have small or larger breasts.
The most important thing to make the Willow fit on your chest is the nipple size. Make sure to check out Willow sizing guide to choose the right flanges size.
You can read more about using Willow for large breasts in this article.
#13 How Do You Align A Willow Pump?
There are three key aspects of successful pumping and getting satisfying milk volume: choosing the right flanges size, getting the right bra and proper alignment.
You nipple should be centered in the flange tunnel / milk container and you should not experience any pinching sensation. If the alignment is done correctly the pump will latch securely on your breast, you will have a good milk flow and you will feel comfortable during the whole pumping session.
Generally speaking the right alignment is when the base of the nipple (not the areola) and the tip of the nipple does not touch the tunnel (either it’s sides, top or bottom).
Try the alignment with the flange itself, move it a bit to find the correct position and once you have it, put the pump on.
Remember to stimulate the nipple first so it perks up. You can also apply some coconut oil or nipple balm to stimulate it. Look at your nipples in the mirror and from the side and bring the flange from the direction that your nipple points.
If you want to realign the pump because you feel uncomfortable or experience pinching sensation, make sure to press pause button before you break the latch.
You should then check your nipple and the suction circle outside of your areola. Your nipple should be in the center of that circle. You can also try to slide the pump to the direction of pinching sensation, but just slightly. If it doesn’t help, you need to align the Willow again (press pause, lean forward, break the latch and try to center your nipple again.)
Here’s useful video by Willow on how to align Willow properly.

#14 How Long Does Willow Stay In Stimulation Mode?
With Willow 3.0 the stimulation mode takes at least 2 minutes, with older generations (2.0 and 1.0) it may last 5-7 minutes.
Sometimes the milk is flowing really slowly. It may be a matter of the position you’re sitting it, or the incorrect alignment when too much air is getting into the bag, or you being stressed, or your breasts need a little encouragement (try to massage them to stimulate the let-down).
In that case you may except the Stimulation Phase to take more than 7 minutes or you may even stay in that phase for the whole pumping session. Don’t worry about it, you are fine! 🙂
#15 How Do I Increase The Suction On My Willow Pump?
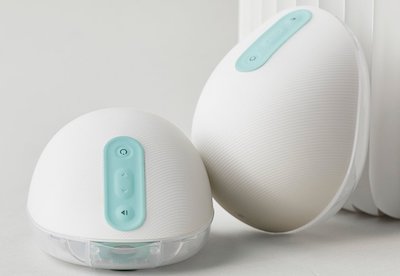
To adjust the suction strength use the blue control panel: down arrow to decrease the vacuum and up arrow to increase it. You can set the suction level for each breast independently. If you’re using the pump with Willow App, it will show you the current vacuum level.
#16 Does The Willow Pump Leak?
The Willow was designed to allow you pump in any position without worrying that your precious milk will leak. Thanks to special valve on milk bag, the milk goes in, but doesn’t spill out. Moreover, the pump works similar to nursing baby – thanks to secure seal. If the flanges size is chosen properly, there should be no issues with leaking. Read more about Willow Hands-Free Breast Pump in this article.
#17 How Do You Boil A Willow Pump?
The pump itself cannot be boiled, clean it with a damp cloth when needed. All other plastic parts like Flanges, Flextube, and Containers can be boiled – and the brand recommends to do it before the first use, as well as once in a while for keeping them in a good condition.
First, remove all packaging, disassemble the flange from the Willow Pump, disassemble the container from the insert and turn the dial to 1.
Place all parts in boiling water for about 10 minutes. Make sure the parts don’ touch each other or don’t touch the sides of the pot.
After the “bath” place the parts on a drying rack or clean paper towel to let them cool and dry.
Never boil the pump (the motor) or milk bags!
#18 Does Insurance Cover The Willow Pump?
Willow is one of the high-end breast pumps and most insurance companies are yet to cover it. But I’ve heard that some moms were able to get at least partial coverage. It’s best to call your insurance company to check what they can offer you, because all companies have various policies.
The purpose of this article is informative. It’s not a substitute for medical consultation or medical care. The author of this article does not accept any responsibility for any liability, loss or risk, personal or otherwise, incurred as a consequence, directly or indirectly, from any information or advice contained here. The article may contain affiliate links – your support helps us run this blog! All pictures of Willow Pump belong to Willow1.


Hello, when I’m pumping it seems like the milk is pooling up in the flange and not going into the flex tube and out into the bags or container. Can you help me with this?
Same! Did you ever find an answer to this?
Did you check Willow Help Center or try to contact their pumping expert? This is the best option https://help.onewillow.com/s/
It may be due to pump suction or the incorrect alignment…